One of the great things about working as an IT Director at Fastenal Company is that I’m afforded the luxury of getting access to software through my MSDN subscription. There has been a lot of talk recently in the press about the forthcoming Windows 10. I decided that it was high time to give it a try.
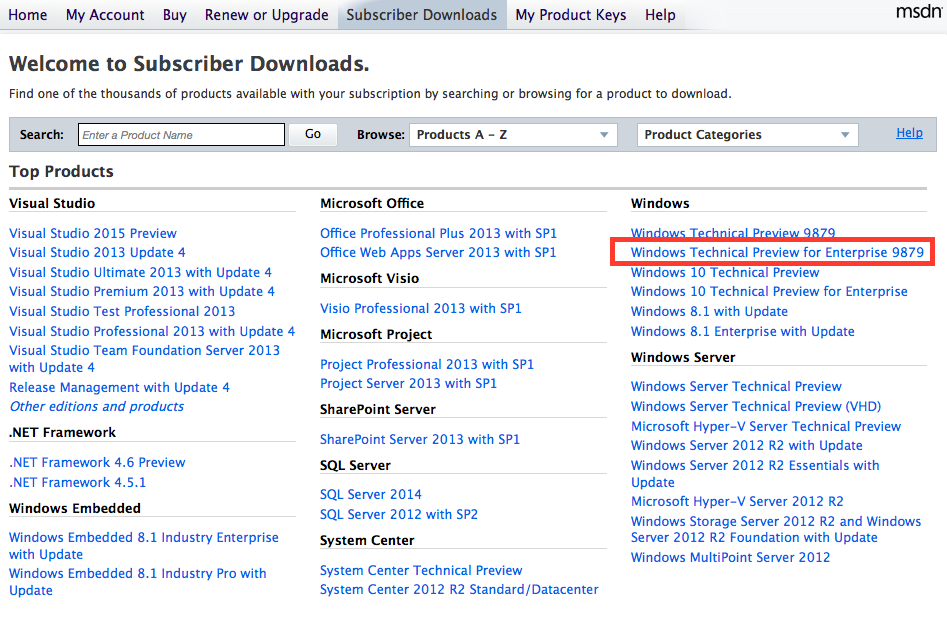
The first step is to log into the MSDN site and download the latest copy of Windows 10. I’m going to grab the latest Windows 10 Technical Preview for Enterprise, since any implementation of this new Operating System at work would like be this candidate.
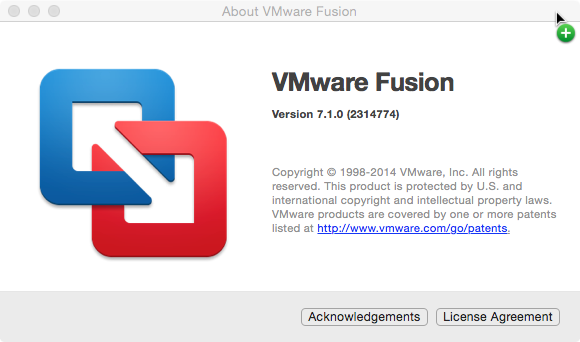
Since I’m doing this work on my Macbook Pro which is running OS X Yosemite, I need a Hypervisor capable of running Windows. My hypervisor of choice happens to be VMware Fusion 7. I’m currently running version 7.1.0
Let’s get started. This is a step-by-step sequence of starting VMware Fusion, selecting the ISO image, and configuring the Virtual Machine.
Step #1 – Start up VMware Fusion by clicking on the VMware icon in your dock.
![]()
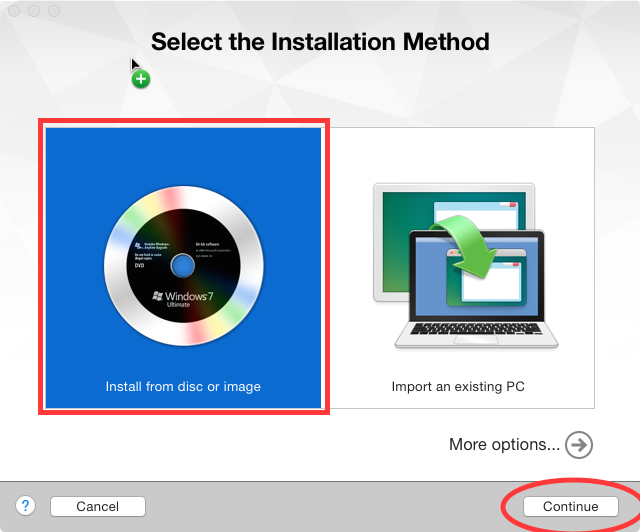
Step #2 – Select the ISO installation method by click on the ‘Install from disc or image‘ icon, and then click ‘Continue‘
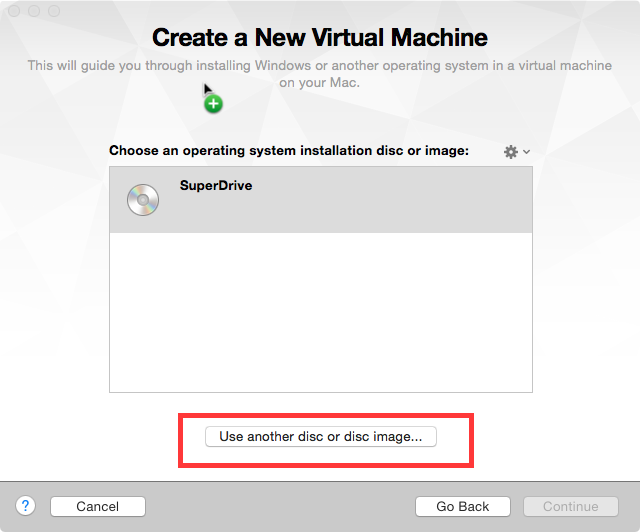
Step #3 – Click on the ‘Use another disc or disc image…‘ button in the Create a New Virtual Machine window.
Step #4 – Navigate to where you downloaded the ISO image file, select it, and click on the ‘Open‘

Step #5 – Once your ISO is selected, you will be taken back to the ‘Create a New Virtual Machine‘ window. From here, click on the ‘Continue‘ button.

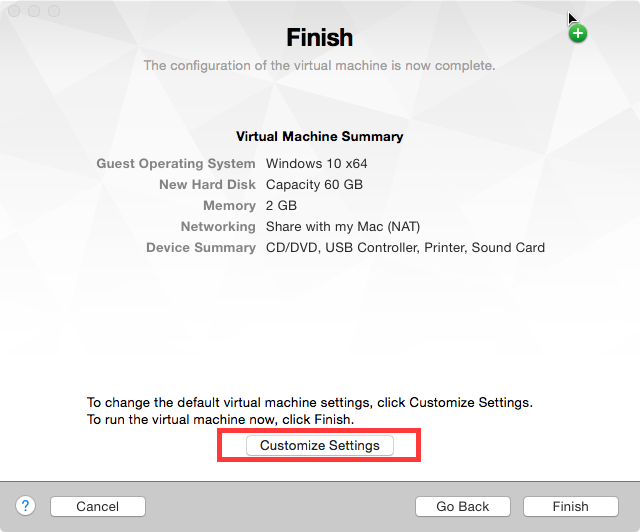
Step #6 – Before finishing up, let’s make some changes. Click on the ‘Customize Settings‘ button.
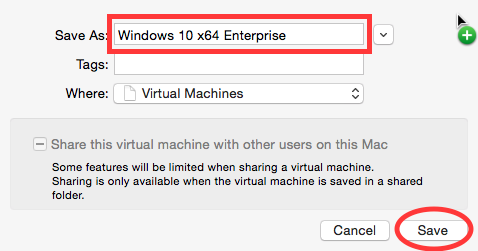
Step #7 – This will give you the chance to change the name of your Virtual Machine. You’ll notice that in Step #6 above, the default VM name given was ‘Windows 10 x64’. I’m going to change mine to ‘Windows 10 x64 Enterprise‘, and then click on the ‘Save‘ button.
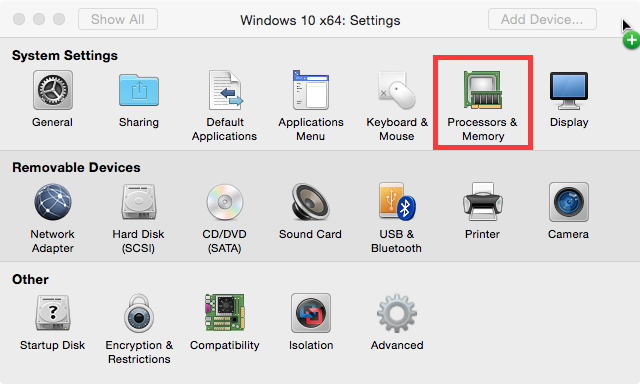
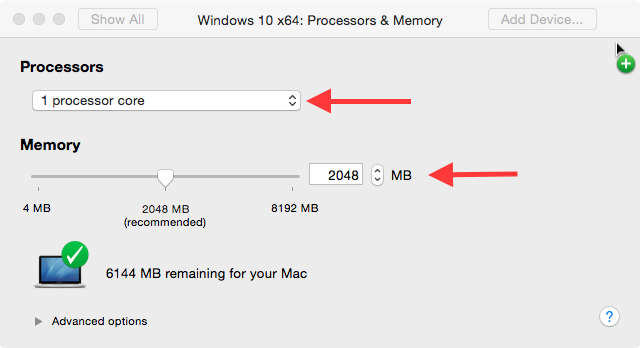
Step #8 – Let’s start out with customizing the Processors & Memory, so go ahead and click on that icon.
Step #9 – I’m going to create my Virtual Machine with 1 processor core, and 2GB of memory. These settings are really dependent upon your host system resources. I’m utilizing a Macbook Pro with a 2.4GHz Intel Core i7 Processor and 8GB memory, so I want to keep this a relatively small virtual machine. Considering that I’m also using a SSD hard drive, these settings should be more than enough to be responsive for testing out this image.
Step #10 –
Step #11 – Set the size of your virtual machine hard drive. I’ve chosen to go with 20GB here.
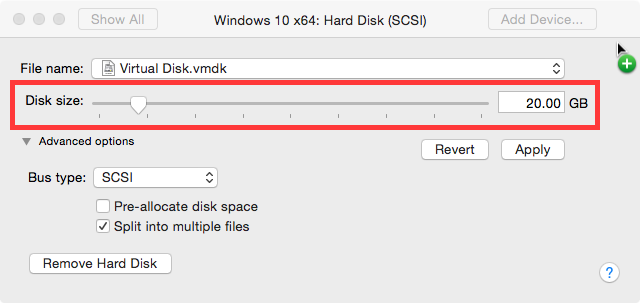
Step #12 – Click the ‘Apply‘ button to save your changes.
Step #13 – Click on the big play icon to start up the Virtual Machine you just customized.

Step #14 – Let’s go ahead and select English as Language to install, and then click on ‘Next‘. This will start the installation of Windows 10 Technical Preview. You can notice in the screenshot below, that our Build version of Windows 10 Technical Preview is 9879.

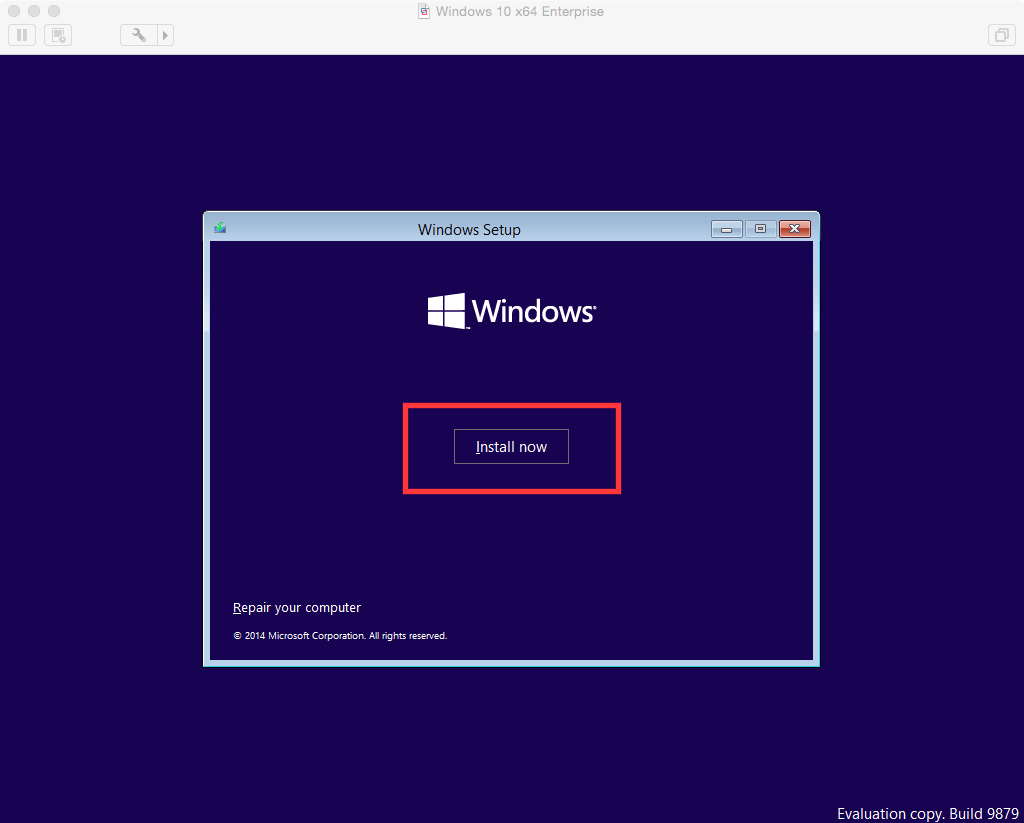
Step #14 – Let’s go ahead and click on the ‘Install Now‘ button.
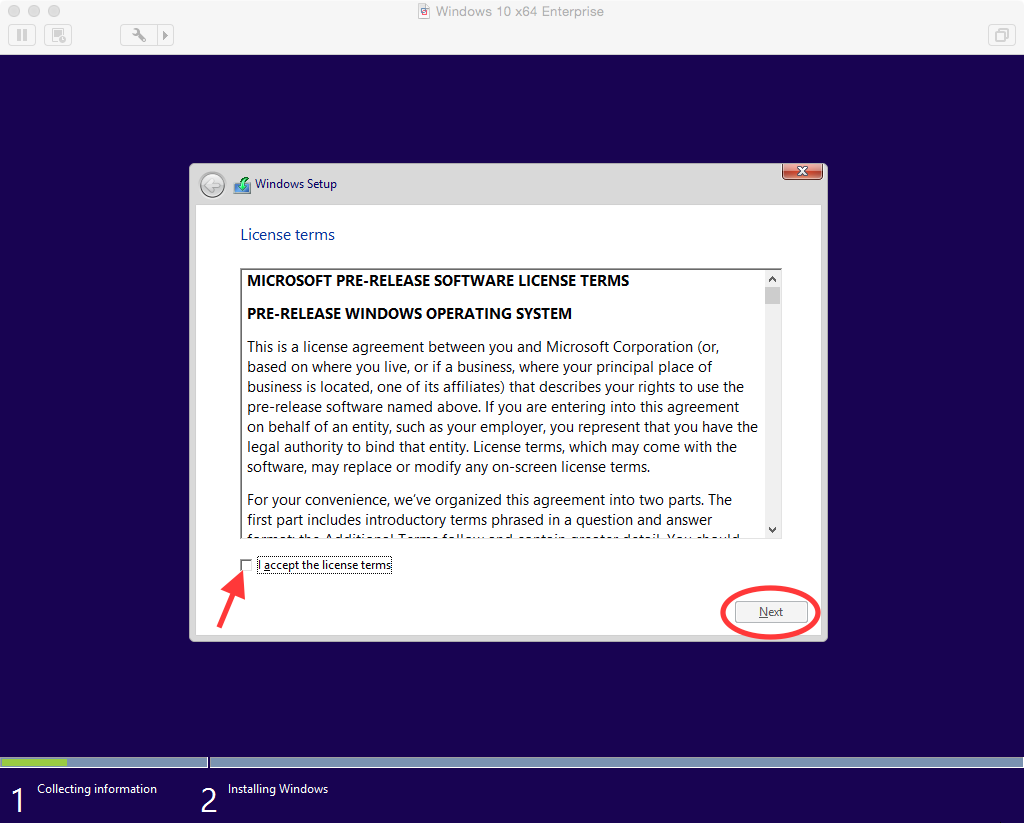
Step #15 – Put a checkmark in the ‘I accept the license terms’ and then click on ‘Next‘.
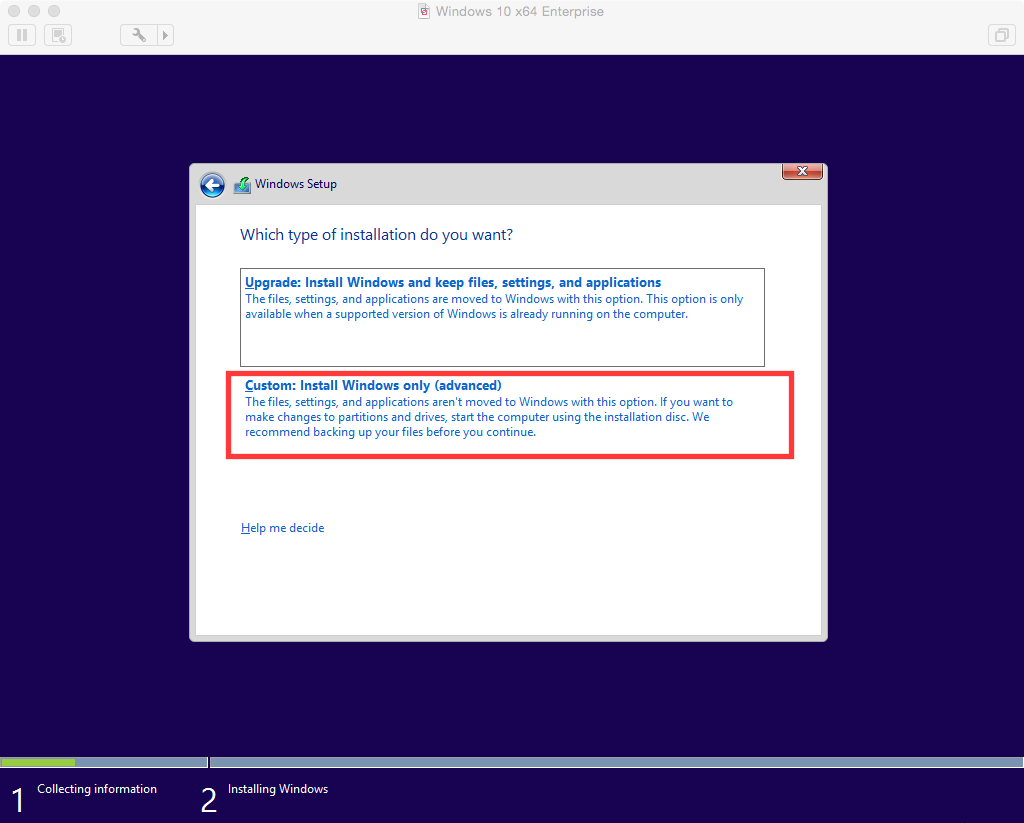
Step #16 – Rather than take the default Upgrade option, let’s select ‘Custom: Install Windows only (advanced)’
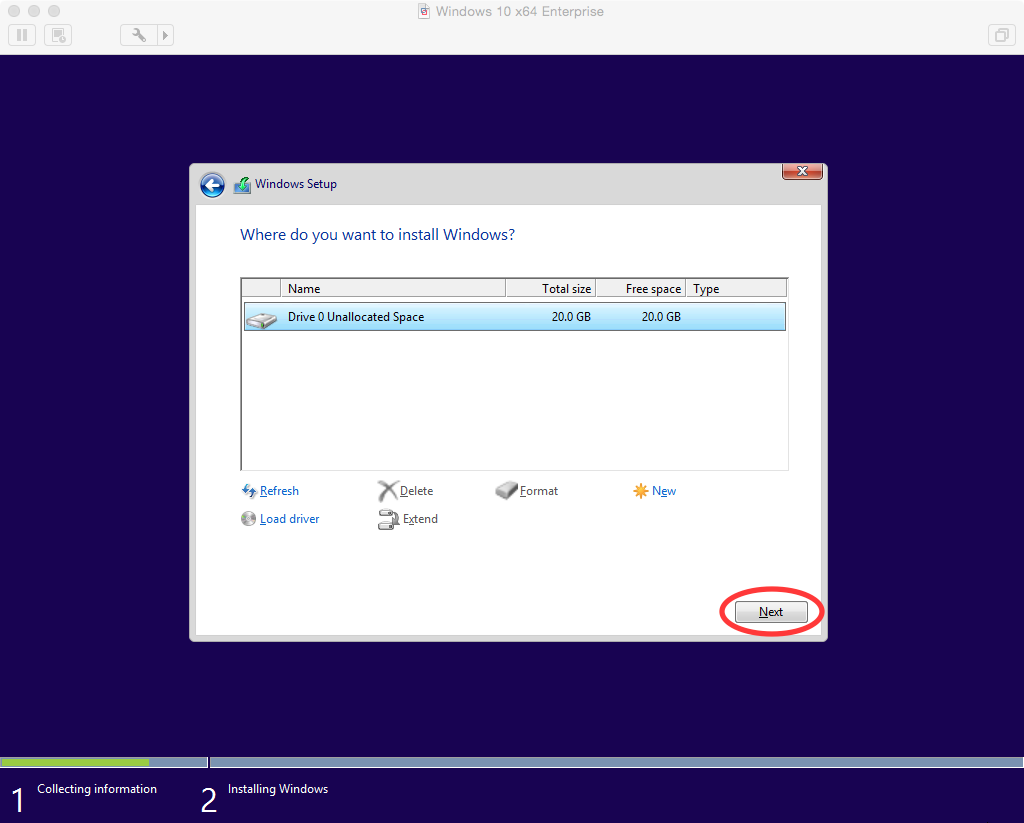
Step #17 – Go ahead and click ‘Next’ on the drive partition page. I’m not going to make any changes on this screen, but you could change the size of your drive if you wanted at this step. I’m going to stick with my 20GB size for now.
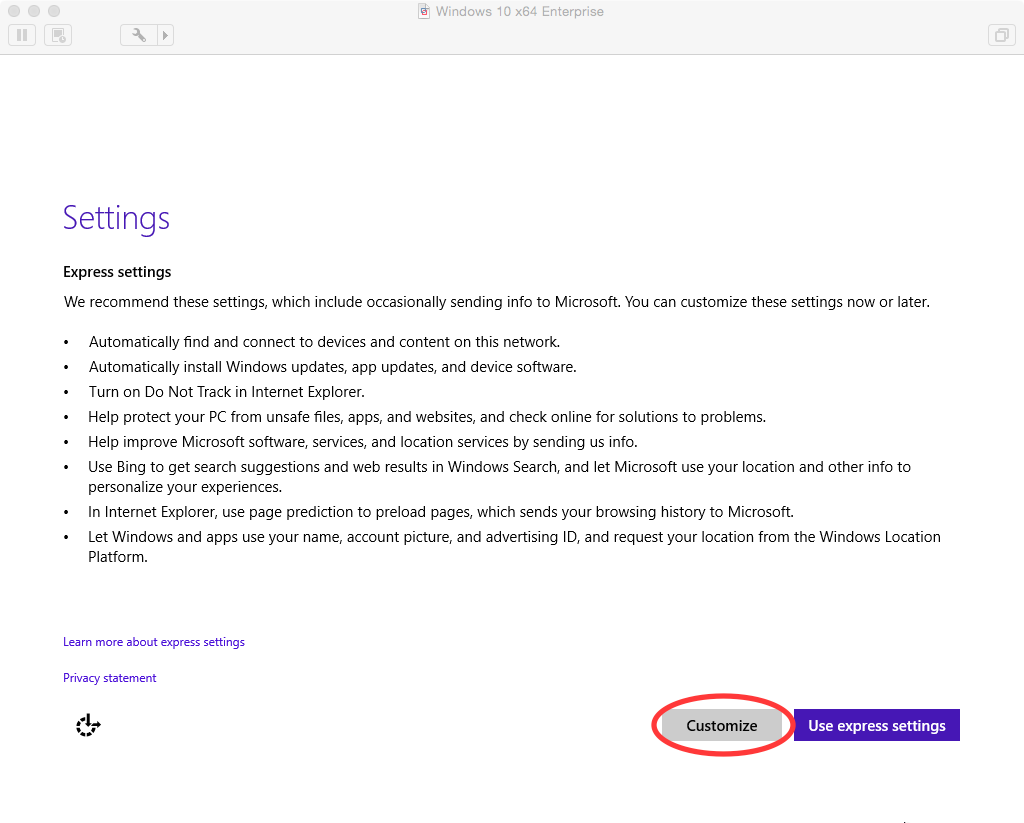
Step #18 – You will notice that at this point, Windows will start the installation process. When it completes, you will be at the Settings screen.

Step #19 – Let’s go ahead and click on the ‘Customize‘ button to look at the settings available for us to configure.
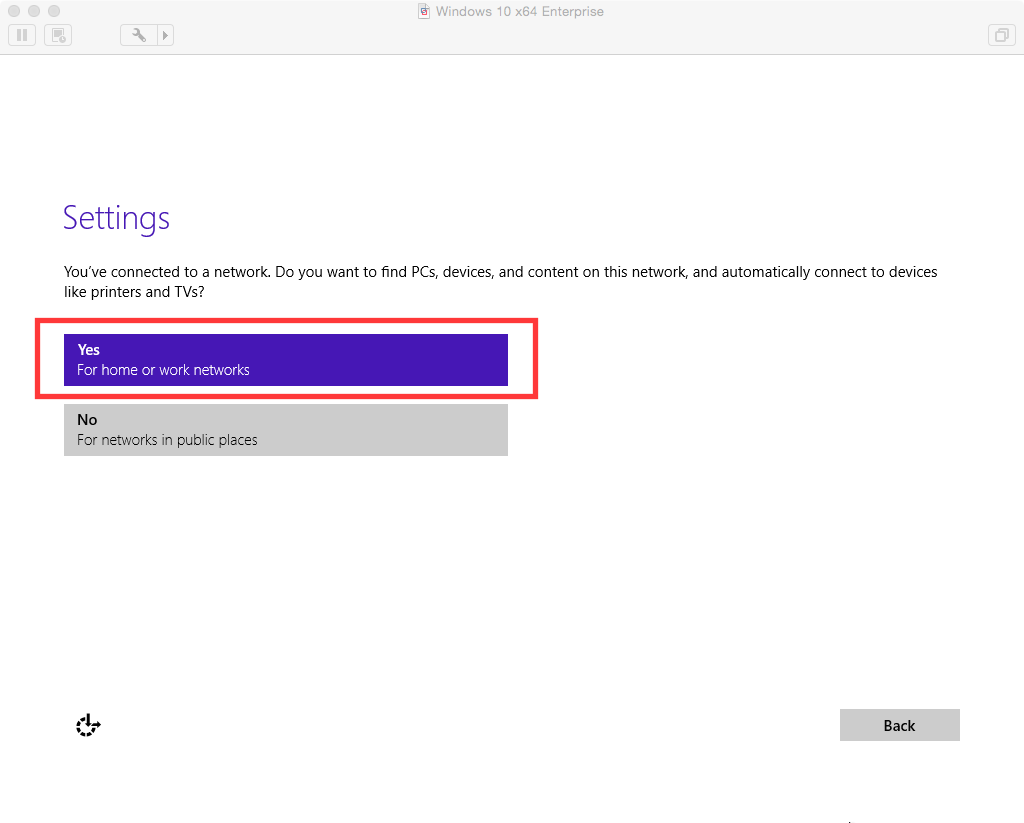
Step #20 – I’m going to go ahead and click on the ‘Yes‘ button to find devices on this network.
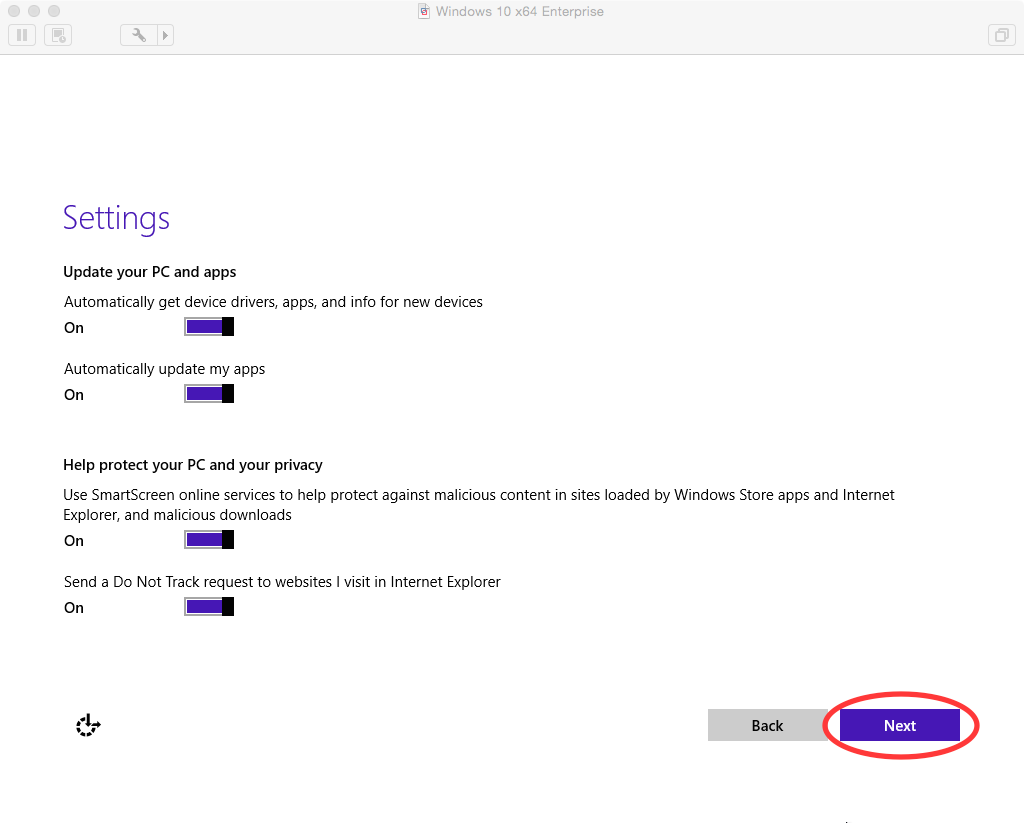
Step #21 – I’m going to go ahead and leave everything below set to ‘On‘ for the Automatic Updates and Privacy settings, and then click on ‘Next‘
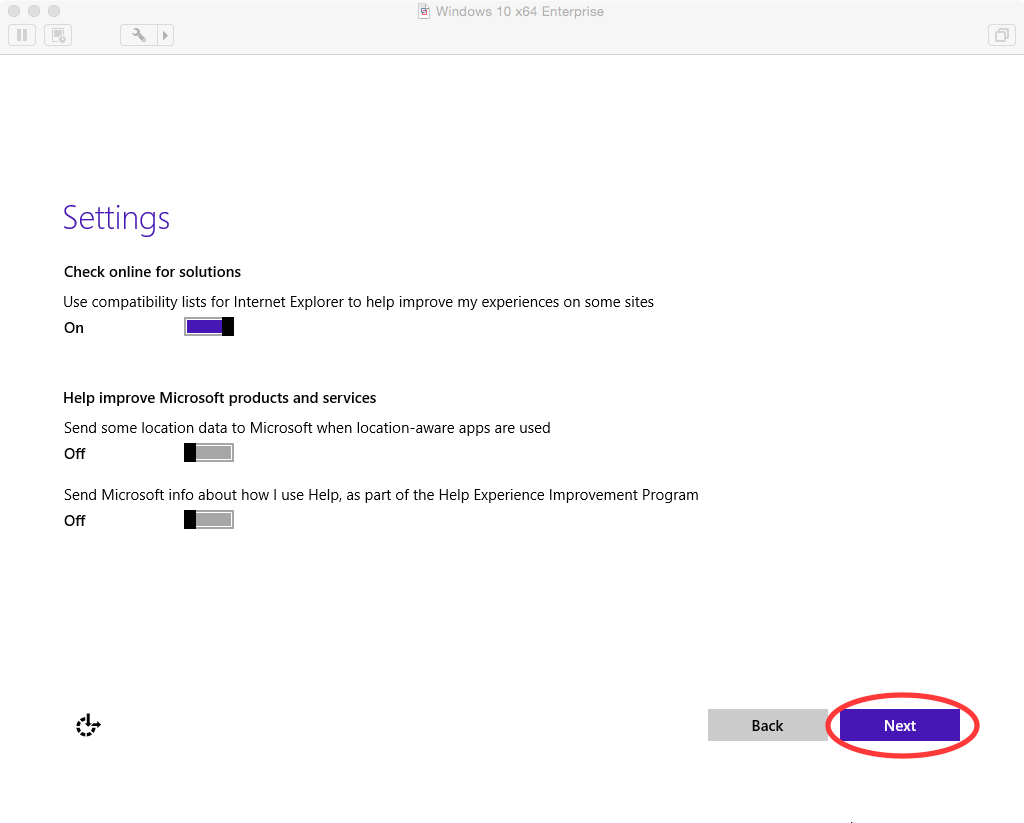
Step #22 – I’m going to leave the setting for checking for updates to Compatibility Lists for IE set to ‘On‘, but turn the settings to ‘Off‘ for location and experience information to Microsoft, and then click on ‘Next‘.
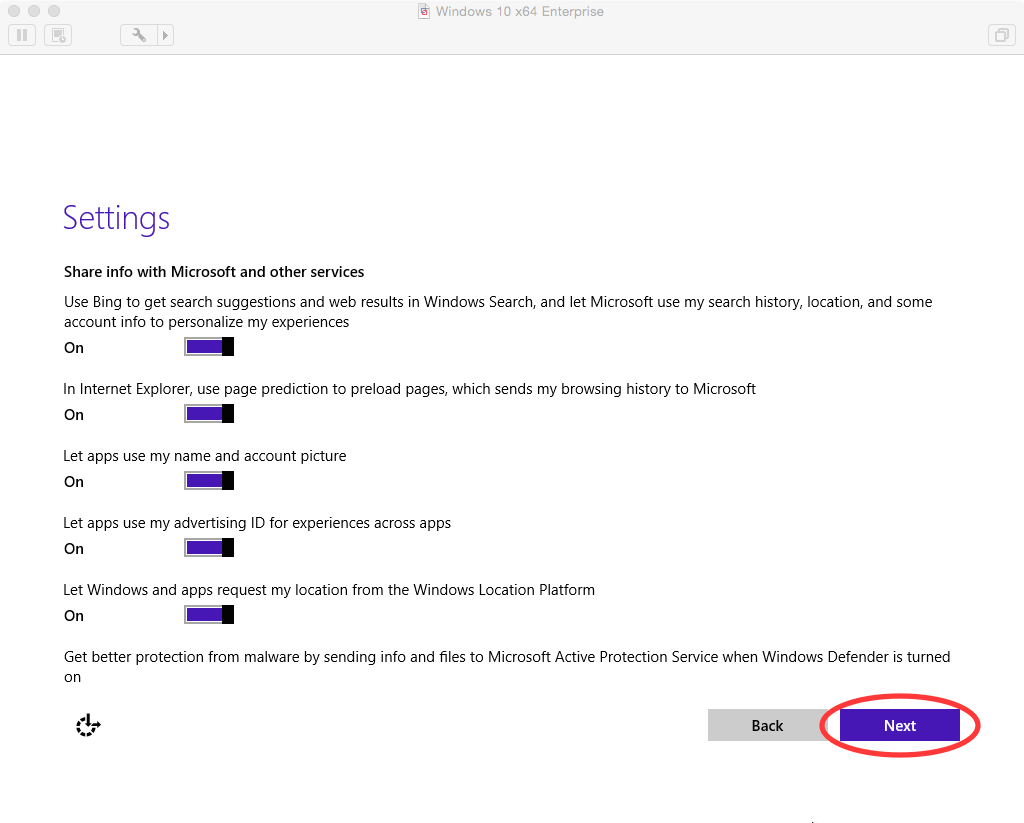
Step #23 – I’m going to leave all settings at ‘On‘ for sharing information with Microsoft and apps, and then click on ‘Next‘.
Step #24 – At this point, you have an option. Either sign in with an existing Microsoft account, or create a new one. I’m going to pick ‘Create a new account‘
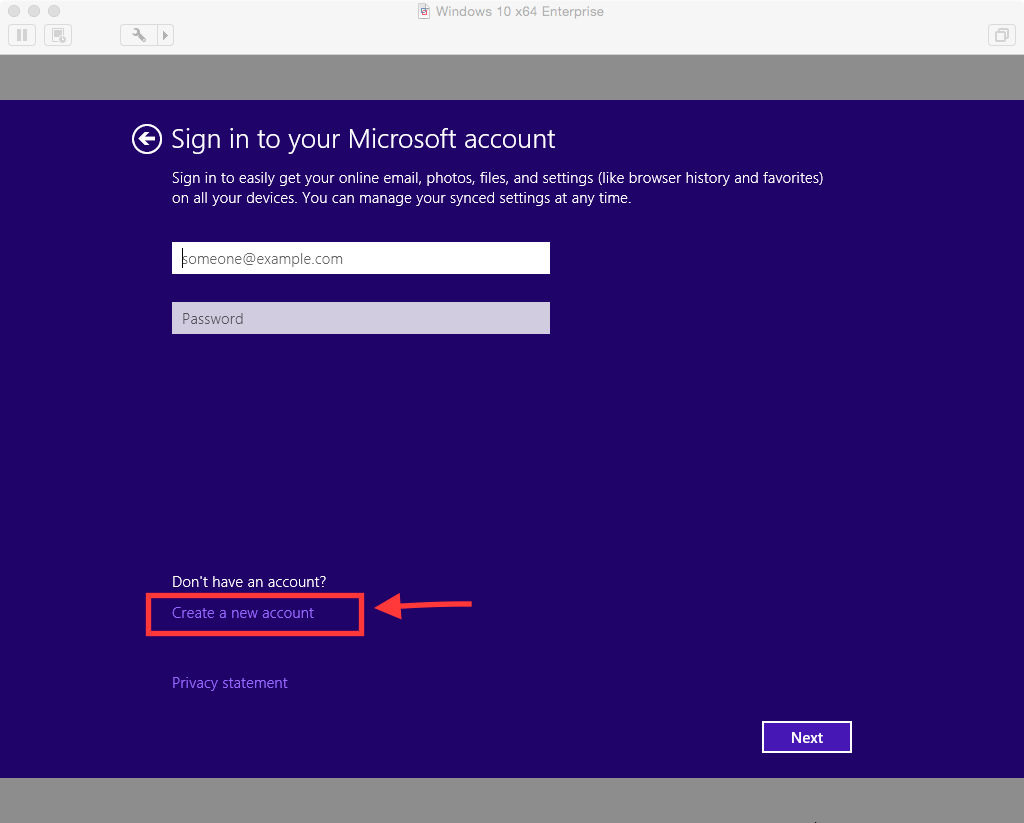
Step #25 – This next screen gives you the option to create a new Microsoft account.
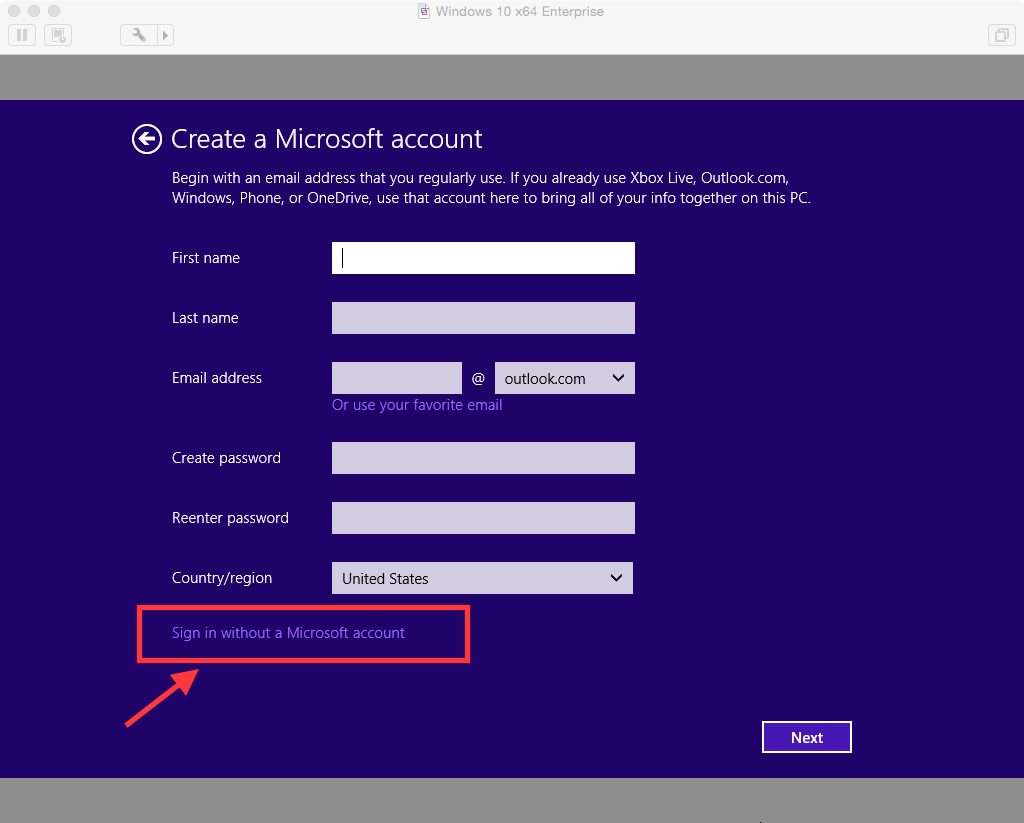
I’m going to skip the Microsoft account creation, and instead create a Local Windows account for this virtual machine. As such, I’m going to click on the ‘Sign in without a Microsoft account‘
Step #26 – Go ahead and create your username, and set the password, and password hint – then click on ‘Finish‘

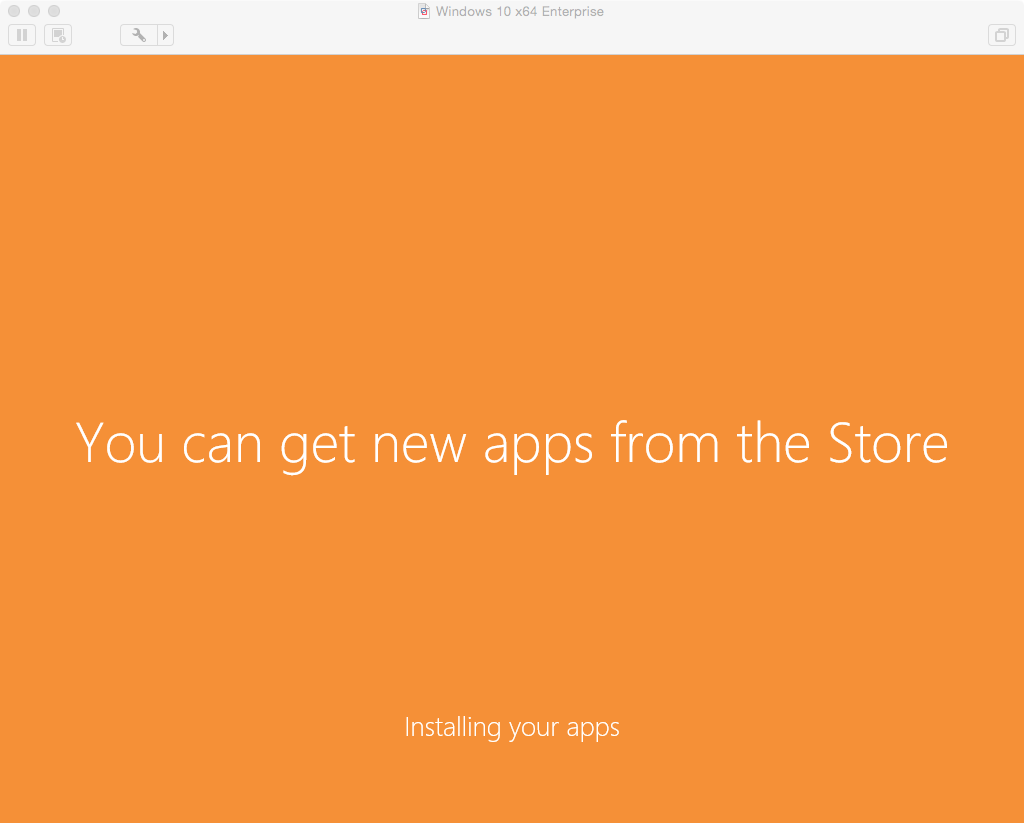
Step #27 – At this point, you will start to see the installation take shape, and the following screen will run for a while as it installs the necessary components of your new Operating System. Simply wait for this to finish.
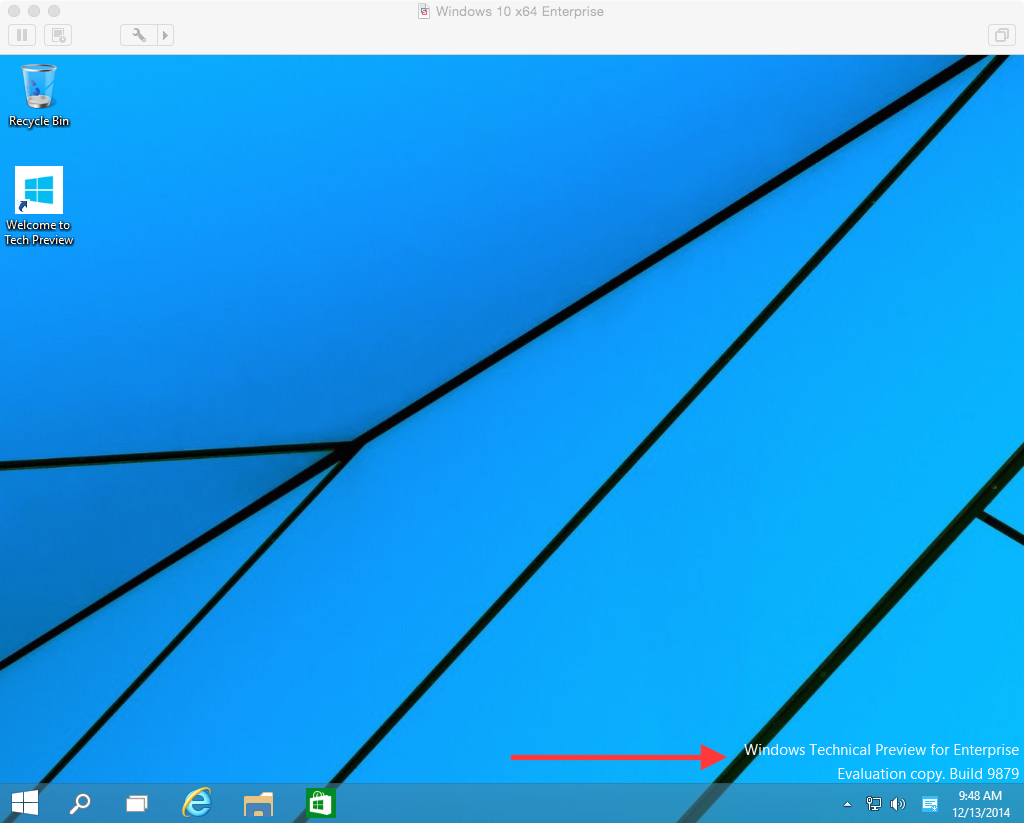
Step #28 – Once you are all done, notice your brand new virtual machine. We can see in the screenshot below that we have a successful Windows 10 Technial Preview for Enterprise. Build Number 9879.
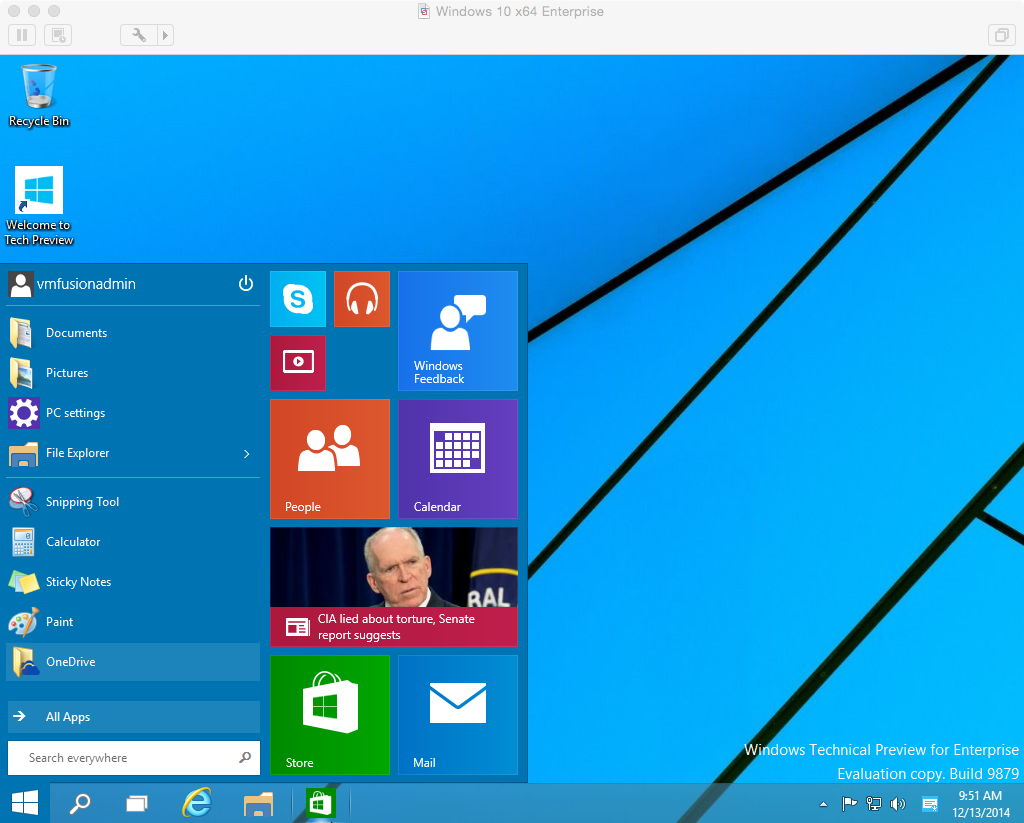
Step #29 – Click on the new ‘Start’ menu icon in the lower left hand corner and you can see how Microsoft has brought back the familiar Start-menu. This should please the masses!
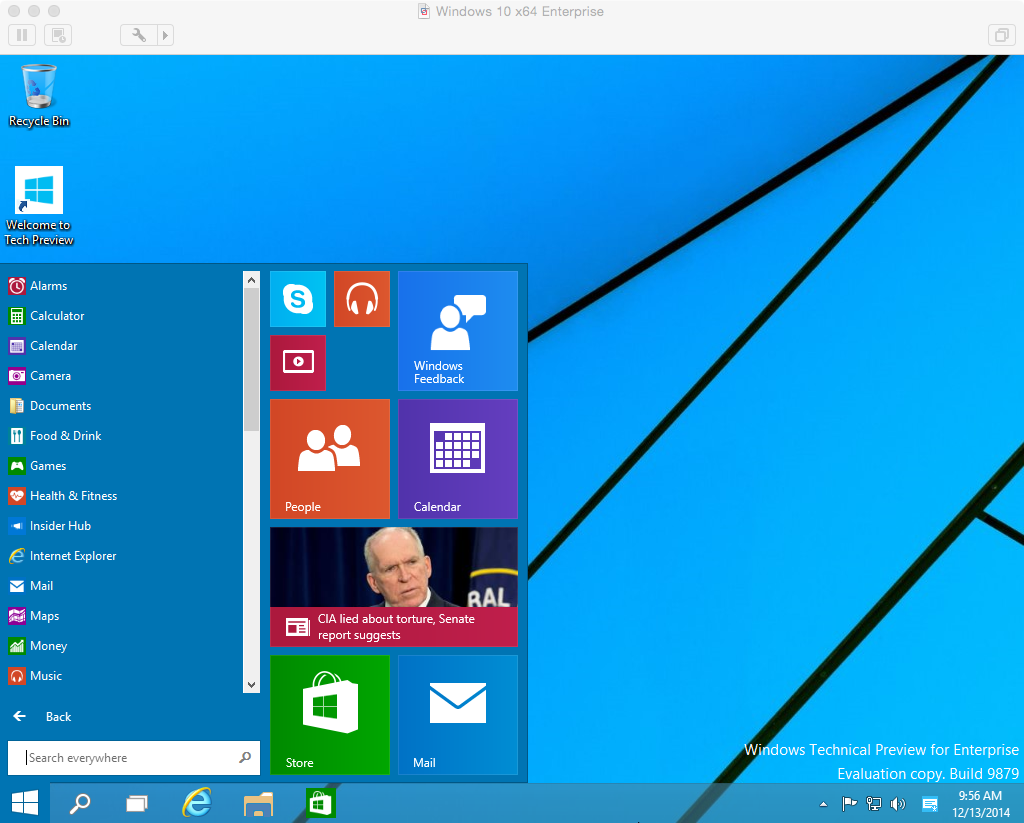
Step #30 – Clicking on the ‘All Apps‘ link in the Start Menu shows you the Applications within the new Start Menu layout.
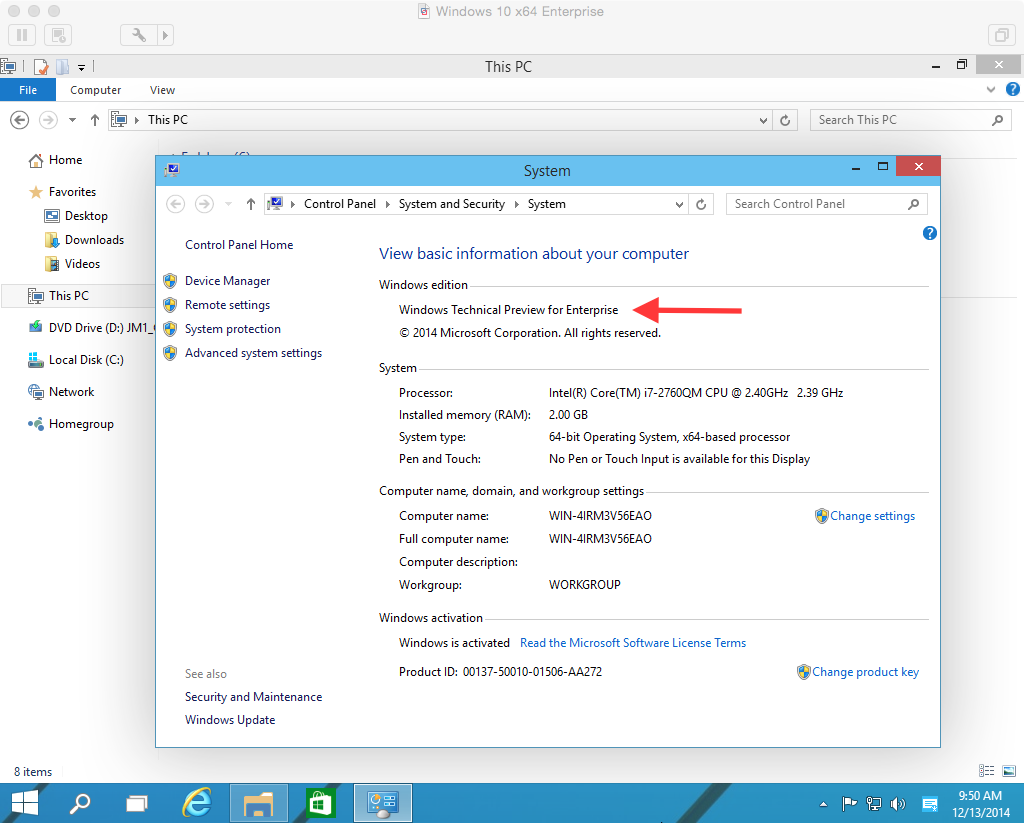
Step #31 – If we open up Explorer View and right-click on the ‘This PC‘ link in the left hand side of the window and look at the properties of our new virtual machine, you can see that we have indeed installed the new Windows Technical Preview for Enterprise.
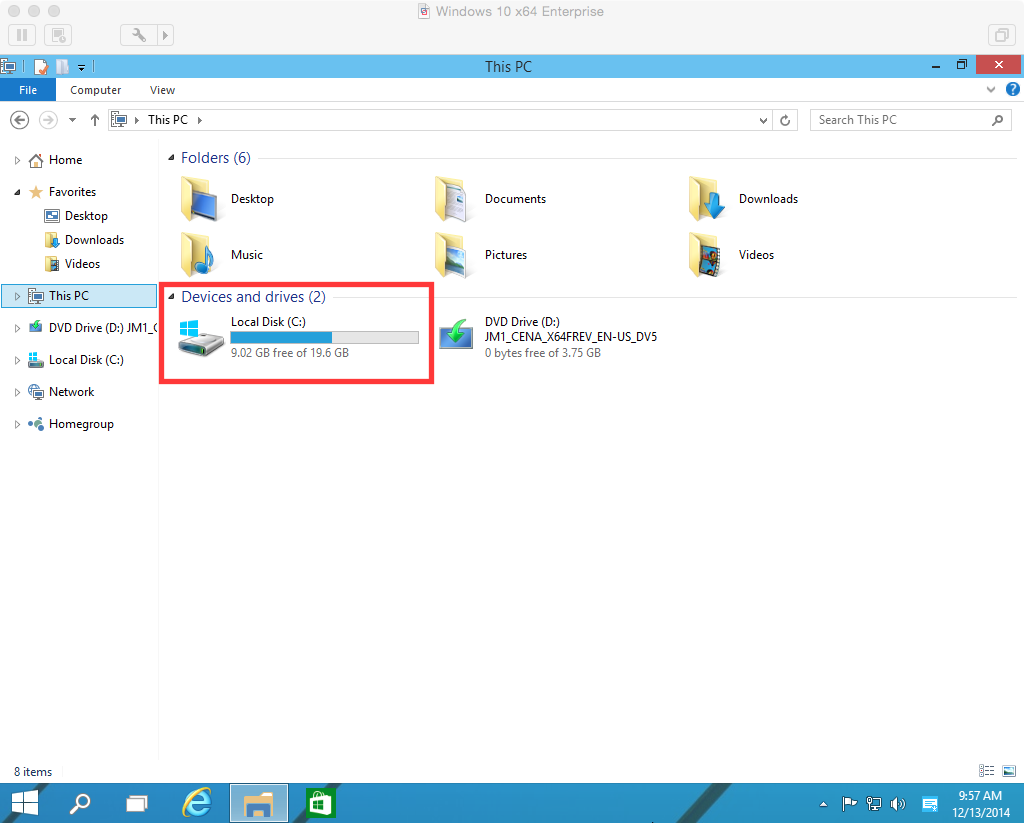
Step #32 – A look at our configured drive size…
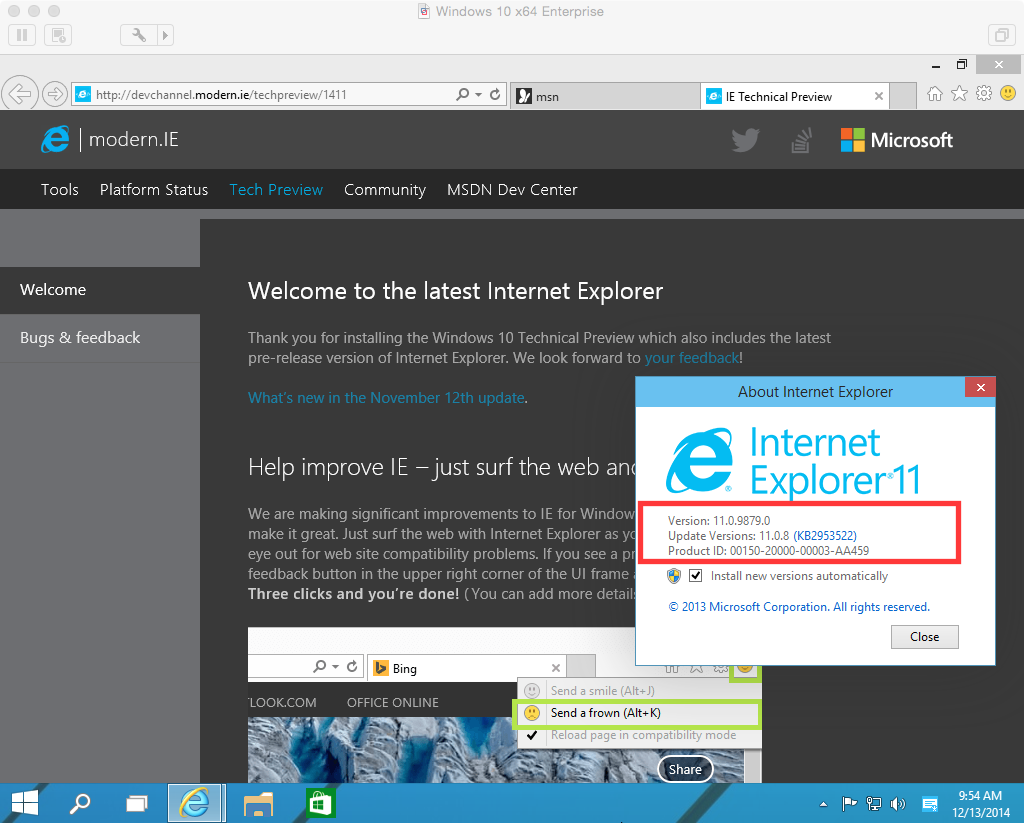
Step #33 – A look at the IE version that is part of this Technical Preview build release.